
 Yes, I’ve just wasted my whole day making some more free Banners and Logos using Mac Word. And it was Fun! But was this really a waste of my day? No, not really, because eye-catching banners, logos and images, attract extra traffic to your blog like bees to honey. And you can use them in so many ways: logos, banners, opt-in pages, emails, sales pages and more.
In the article, How To Optimize Images for Speed & SEO I explained how someone who visits your blog to find an image, is still counted as genuine ‘visit’ in your stats? Yes it does. Every visit you get when someone came to your blog to find an image, builds your visitor numbers – your traffic. These visits ‘count’ as a visit in the eyes of Google, just as much as someone who visits your site to read your latest Words of Wisdom.
So, maybe, if I now publish the results of my day’s playing around with Microsoft Word for Mac Imaging Tools, I’ll get a whole swag of new visitors coming to visit me here at my Blog to see my stunning  new graphics and images. Only time will tell. Fingers crossed.
This Is How Images, Meta Descriptions, and Search Engines Work To Build Traffic
Here’s how images work to build traffic: First, you upload an image into your blog post. Then you MUST always include a Meta Description using the ‘Description’ Text Box you see during uploading using the WordPress Upload software.
This Meta Description must accurately describe your image in words. Why? Because Google’s web crawlers cannot ‘see’ images at all. Google’s a bank of computers – right?? Google can only ‘see’ and ‘know’ what your image is about, by reading your Meta Description.
So your meta description is the hook that you hope Google will latch onto when someone enters a Search in the Google Search engine, and is looking for an image similar to that image you have uploaded into your Post.
Bonus Tip: imagine you were describing your image to someone who is blind. Google is blind to images, but we still want Google to ‘see’ and ‘know’ what our image is really is about. Why? Because we want to maximize the chances that Google will select our images when someone goes searching for images that match our image, that is posted on our blog. Ching!
If you can include a Keyword in your Meta Description that closely relates to your article, that might give you extra Brownie Points from Google.
Warning: Adding Keywords into your Meta Description only works to your advantage (maybe), if that keyword is a natural match with that image.
For example: Don’t stick the word ‘Burger’ into your meta description for a photo of an iPhone. You might think that’s a relevant keyword because your article is about Burgers, and you can use an iPhone to order one. Google won’t. Why?
Because the image is of an iPhone, not a Burger. Doh! That’s very misleading, and very un-helpful for everyone, including Google. In fact, that sort of thing makes Google very cross indeed – downgrading imminent!
How Images Can Boost Your Visitor Numbers & Traffic
So, when someone does a Google search for an image, Google trawls through its data banks and coughs up (a technical term) images that best ‘answer’ the image query made by the searcher.
So, I’m now going to upload my day’s ‘work’ and see if I can attract some nice juicy extra visitors with my images….hmmm…hang on, let me re-phrase that: so I can provide High Value Content that has highly Relevant Images that will inspire creative Bloggers everywhere – and impress Google.
More Banners and Images Made Using Microsoft Word Design Tools
I’ve already posted 2 articles on how to use Microsoft Word Design Tools:
In those articles I explained in detail and with screenshots, how to use various Word Design Tools, and how you can use them to make professional looking images and Banners.
Today’s article uses the same Word tools, plus a few new ones, to explore a few more of the goodies that are included free in Microsoft Word. I use Microsoft Word for Mac, but the tools are very similar.
How To Use Shapes, Text and Shadowing Effects in Word
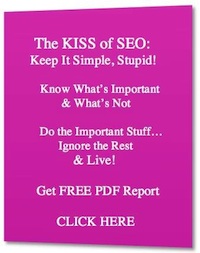
Disclaimer: First I have to warn you that you have to try to contain your excitement: clicking on the following Banner will not get you a free PDF Report about SEO – that PDF is a work in progress, along with a few others….because I spent all day designing fancy graphics for it. As you do… right? The free stuff will be coming soon…..I promise.

I did that one using the Add Shapes; Fill Color; Add Text; Format Text that I covered in my two previous articles on Using Word Design Tools. The graphic is a bit ‘wordy’, but I used nothing very new there.
The thin border around the image has been added automatically by my theme for clarity – that is not part of the image.
Here’s the same graphic with the addition of what Word calls ‘Bevel’ – a tool in the Word Format Options Ribbon across the top of the Word document.

Here is the same original graphic showing the effects of Shadow on the left, and 3D Perspective on the right. You can vary the angle of Shadow.
Now for something completely different:
For all you egg heads out there:
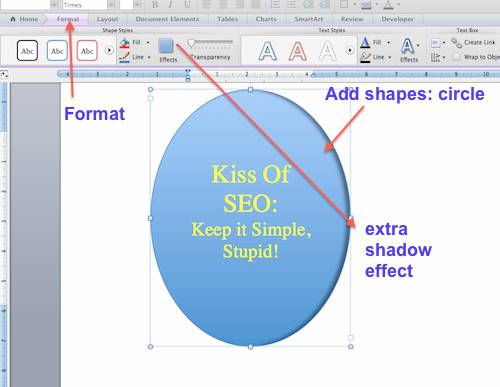
You reveal the row of Format Tools by clicking inside your shape and then clicking on the Format icon in the Word tools ribbon you can see at top left of this image below.
Here’s where I got a bit more creative – well that’s one word for it anyway:
With the next image, I used Add Shapes, Add Text, different Fill Colors, Shadow Effects, and my all time favorite Glow, to spread the Google Love, hopefully, my way.
Brace yourself – it’s a bit garish:
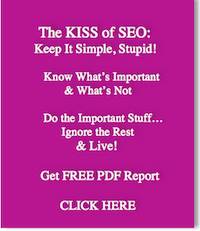
 And here is the red blur version of the graphic I used at the top of this article:
 You can adjust the amount and color of the blur effect.
The image at the top of this post is the same image as this one above, but it has a bit more blur, and the blur was green. The green blur heart image is my favorite, and the pinnacle achievement of my day’s play using Word Image Editing Tools. You can do it too – and it’s FREE.
Time for some well earned chips, I think! Yes! James!…. More chips, please!
Have you Subscribed to our Newsletter yet? Here’s where you can sign up, and it’s free: Just click on Get Regular Email Updates ….and you can also check out how you think I did with designing my Subscribe Form – be kind.